
Architecture and High-Level Design in Frontend System Design
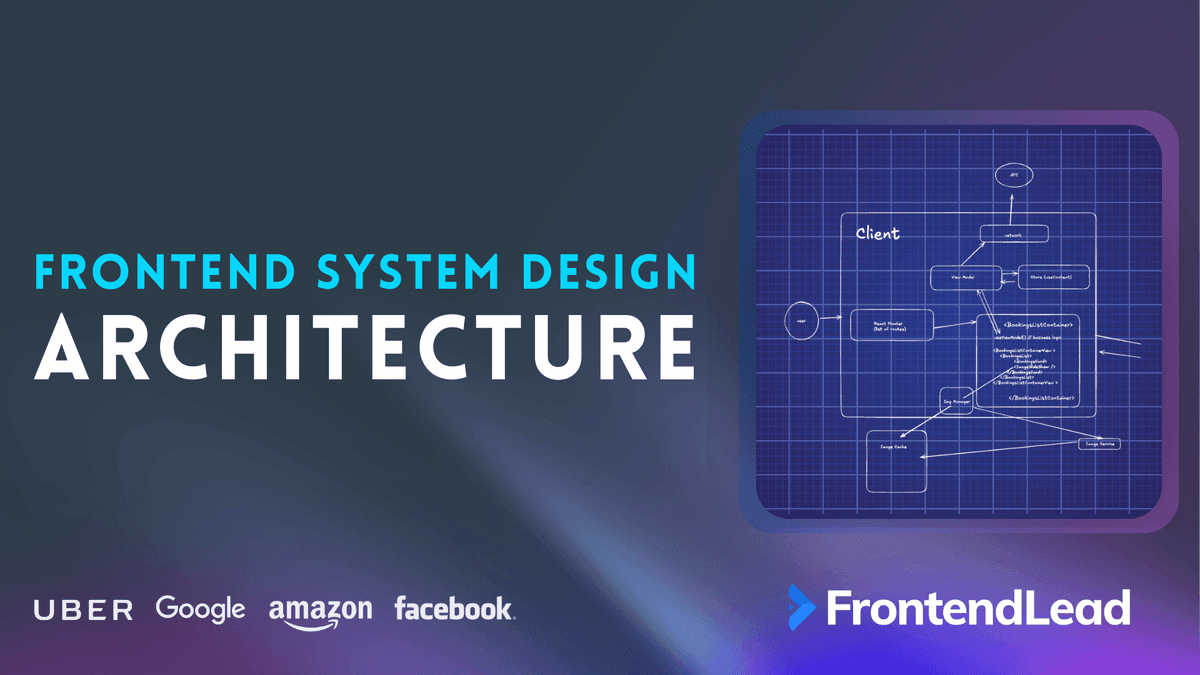
The architecture portion of front-end system design interviews is arguably one, if not the most critical and time-consuming portion of the interview. The point of this round is for you to show how you’d lay out your component hierarchy and how all of those pieces connect within your front-end infrastructure. A clear frontend architecture diagram is the best way to show that.
Start by spending 20% of your interview discussing high-level architecture design, and then come back to this to add more features as you encounter them, all in all, 35% of your interview can be spent here.
You can cover a lot of ground here, and you’ll probably return to this section as you explore topics like performance, state management, or data flow.
For example, if you’re building an infinite scrolling list, you might first lay out your high-level components, then come back to explain how your FeedList component will use virtualization (like react-window or react-virtualized) and an IntersectionObserver to trigger new fetches.
Considering the requirements, your goal is to develop a product/system architecture by identifying the key components of the product, how they interact with each other, and how they are related.
Remember to focus on the client-side architecture, not the back end. Diagrams are your friends here. Each component can be represented using a rectangle. Your high-level design usually resembles a few rectangular boxes with arrows between them to demonstrate the data flow.
It is also possible to have components within components; in that case, draw the parent using bigger rectangles since they need to fit multiple subcomponents.
Think about breaking your components into individual parts. Each part provides its specific purpose.
Diagramming Your Architecture
You’ll need to draw or outline your component hierarchy clearly. Most interviewers expect some visuals.
You will generally either draw this diagram virtually using one of the tools below or, if in person, draw it on a whiteboard.
- LucidChart: This is a freemium platform for drawing diagrams with many features.
- Excalidraw: A user-friendly tool for creating hand-drawn-like diagrams.
- diagrams.net: A versatile tool for creating diagrams and flowcharts.
Practice sketching standard layouts so you’re not fumbling with tools during the interview.
Backend Blackbox
In front-end system design interviews, we can treat the server as a black box and assume it exposes some APIs you can call via HTTP/WebSockets. The server handles client requests, processes them, and returns the appropriate responses. It can also manage data storage and retrieval, ensuring the client can access the necessary information.
The only time you may need to discuss the backend is during API design, more on that in the following few articles. Even still, you won’t be asked to build the table schemas, etc, more about the expected request and response from the backend.
Now, if you are in a full-stack loop, then yes, study up on backend principles. Here is an article that walks you through backend fundamentals. Clarify with your interviewer how much you should speak about the front end vs. the backend.
Is it 50/50, 30/70, etc, that can help you guide your interview immediately.
Focus on the Client-Side
Remember, your job is to lay out the client-side architecture. Don’t get bogged down in the backend unless asked to. You want to separate concerns: parent containers, dumb/presentational components, smart containers, reusable UI widgets, etc.
Separation of Concern (MVC vs MVVM)
There’s no single correct answer here. I like using the MVVM (Model-View-ViewModel) pattern because it creates a clean separation between business logic, state, and UI layers. However, MVC (Model-View-Controller) and similar patterns are also totally valid. The main thing is that your architecture is organized and clear, and you can explain why you chose it.
Examples
I’ll show two example architectures:
- Airbnb Front-End (MVVM Example)
- Sprint Board (MVC Example)
Commonalities between the two
- Component Hierarchy: Show how you break down the UI into logical, reusable pieces.
- Separation of Concerns: Make it clear what each component is responsible for. Keep business logic out of pure UI components.
- Reusability: Identify which components can be reused elsewhere in the app.
- Data Flow: Sketch out where state lives (local vs global), how it moves between components, and how components communicate (props, context, events, etc.).
- Extensibility: Briefly mention how your architecture could adapt as features grow.
Tip
Please return to this diagram and update it as you answer follow-up questions about features, performance, or scaling. Don’t be afraid to revise your architecture in real time; it shows you can adapt as new requirements arise.
Design a Simple Airbnb Client Architecture (MVVM)

This diagram lays out a modern frontend architecture using the MVVM pattern, and is typical of what you’d want to describe in a system design interview.
Let’s walk through each piece and how the data flows.
High-Level Overview
Everything here lives on the client. The client’s main job is to manage routing, state, business logic, rendering, and optimizations like image loading and caching.
User & Routing
- User → React Router
The user interacts with the app, which React Router manages. Based on the URL, routing determines which screen (or view) to show.
MVVM Layers
- View Model
This is the main bridge between the UI and your business logic. It talks to the network layer (for API calls), manages local state with something like React Context (shown here as “Store”), and prepares data for the UI to consume.- Think of the View Model as the smart layer: it fetches data, manages state, and exposes exactly what the view needs.
- Store (useContext)
The Store holds shared app state, such as user sessions, cached data, feature toggles, etc., and lets the View Model read/write to it.- Context API, Redux, Zustand, or similar could power a React app.
- Network
It handles all API requests. The View Model calls the network to fetch or post data and then updates the Store as needed.
View Layer
<BookingsListContainer />
The container component connects to the View Model (typically via auseViewModelhook). It orchestrates fetching data and renders the correct UI components.- This keeps the UI layer as dumb as possible; it just renders what it’s given.
<BookingsList/>
To handle infinite scrolling efficiently, we render this as a virtualized list. This only renders items in the viewport, boosting performance and smooth scrolling.<BookingsCard/>,<ImageSlideShow/>
These are presentational components nested inside the virtualized list. Each is focused on rendering a specific part of the UI and receives all its data via props from the parent/container.
Image Optimization
Image Manager&Cache
Image-heavy apps need brilliant image handling. The Image Manager decides when and how to fetch images, pulls from the Image Cache if available, and requests new photos from the Image Service (usually via API).Image Service
A backend service for fetching, resizing, or optimizing images on demand.
API Layer
- Apart from image requests, which go straight to the Image Service (often a CDN), the only way to contact the backend is through the network layer’s API. Everything else is client-side.
Why This Frontend Architecture Works
- Clear separation of concerns:
Business logic (View Model), state (Store), rendering (View), and resource management (Image Manager/Cache) are all isolated and testable. - Extensible:
Easy to add features like offline caching, loading states, error boundaries, and analytics. - Performant:
Virtualized lists and aggressive image caching reduce client memory and boost UX. - Testable and maintainable:
UI components are as dumb as possible. State and logic changes are isolated and easy to cover with unit tests.
How to Use This in an Interview
Talk through each piece, and show how data and user actions flow through the system. Point out how you’d handle edge cases (loading, errors, caching) and how each layer could be extended for future requirements (adding chat, more media, new screens, etc.).
You want your interviewer to see that you’re thinking about:
- Modularity
- Performance
- Scalability
- Real-world UX tradeoffs
That’s the goal with a diagram like this. If you’re asked to go deeper, you can pick any part (like image caching or the virtualized list) and explain exactly how you’d implement it.
Here is the same diagram but using pseudocode:
<!-- High-level pseudocode example based on the frontend architecture diagram -->

<!-- App entry point -->
<App>
  <Router>
    <!-- Handles navigation between different screens -->
    <Route path="/bookings">
      <BookingsListContainer />
    </Route>
    <!-- ...other routes -->
  </Router>
</App>

<!-- Bookings List Container (MVVM pattern) -->
<BookingsListContainer>
  <!-- useViewModel() handles business logic, state, API calls -->
  <BookingsListContainerView>
    <BookingsList>
      <!-- Render a list of bookings -->
      <BookingsCard>
        <ImageSlideShow />
      </BookingsCard>
      <!-- Repeat BookingsCard for each booking -->
    </BookingsList>
  </BookingsListContainerView>
</BookingsListContainer>

<!-- ViewModel logic (abstracted) -->
<!--
  useViewModel() {
    // Fetch data from API using the network layer
    // Interact with Store (useContext or other state management)
    // Return state and actions for the UI
  }
-->

<!-- ImgManager component handles image requests and caching -->
<!--
  ImgManager(src) {
    // Check ImageCache first
    // If not cached, fetch from ImageService
    // Preload images, manage cache eviction
  }
-->

<!-- ImageCache could use memory, IndexedDB, or browser cache -->

<!-- ImageService interacts with backend to fetch/optimize images -->

<!-- BookingCard and ImageSlideShow are presentational components -->Design a Sprint Board Client Architecture (MVC)

This diagram describes a classic frontend architecture using the MVC (Model-View-Controller) pattern. It is precisely the style of answer you’d want to provide in a system design interview.
Let’s break down each section and see how data and actions flow through the system.
High-Level Overview
Everything here lives on the client. The client’s job is to manage the board state, handle user interactions (like creating a new board or moving tickets), trigger server updates, and reflect those changes in the UI.
User Actions & Controller Layer
User Actions
-
The user creates a new board or interacts with existing tickets (e.g., dragging and dropping to a new column, updating a ticket).
Board Controller (Controller)
-
The Board Controller receives all user actions.
-
For example, when a ticket is dragged to a new column, the controller processes that interaction, updates the state, and coordinates server updates.
-
Separates concerns: keeps logic out of the UI layer.
Example Flows
Creating a New Board
-
The user clicks to create a new board.
-
The Board Controller handles the creation logic.
-
Sends the request to the Data Model Store, which persists it to the server.
-
Updates are reflected in the Data Model, and the UI rerenders the new board view.
Updating Existing Tickets
-
The user drags a ticket:
-
Drag Start: The Controller starts tracking the drag.
-
Drag End: When dropped, the controller gets the new column ID.
-
Server Update: The controller updates the Data Model Store right away (optimistic UI), then triggers a server update for the change.
-
-
The UI reflects the updated ticket state immediately. If the server rejects the change, the controller rolls the Data Model Store back to the previous column and shows an error.
Views
Views Box
-
Contains all UI elements, including the Sprint Board and the Create Composer.
-
Each of these views contains child components and handles user interactions.
-
These are the “dumb” view layers; they render what the controller and model provide, and never handle business logic directly.
Controller & Data Model Store
-
Controller: Acts as the central logic hub, handling data flow between the view and the model.
-
Data Model Store: Stores app state, manages updates, and ensures consistency between what the user sees and what’s stored in the model.
-
Data Model: The source of truth for all board, ticket, and column data.
Why This Architecture Works
-
Clear MVC Separation:
-
Controller: Handles user actions and orchestrates updates.
-
View: Renders state, receives updates, and reflects UI changes.
-
Model: Stores data, updates state, syncs with the backend.
-
-
Testable and Maintainable:
-
Logic is isolated in the controller.
-
The view is pure UI and easy to test or replace.
-
-
Extensible:
-
Easy to add new features (e.g., new board actions, advanced ticket filtering, multi-user collaboration).
-
-
Predictable Data Flow:
-
All user actions are handled in the controller, keeping logic centralized and state changes traceable.
-
How to Use This in an Interview
Talk through each part, and show how a user action (like dragging a ticket) travels through the controller, updates the model, and finally renders in the view. Point out how the controller and model store can handle server updates and optimistic UI.
If asked to go deeper, you can walk through edge cases (conflicting updates, failed server responses, offline mode) and explain how MVC helps handle each scenario.
Pseudocode for MVC Sprint Board
<!-- High-level pseudocode based on the Sprint Board MVC architecture -->

<!-- App entry point -->
<App>
  <!-- Main Controller handles all board actions -->
  <BoardController>
    <!-- Views handle rendering only -->
    <SprintBoard>
      <!-- Child Components for columns, tickets, etc. -->
    </SprintBoard>
    <CreateComposer />
  </BoardController>
</App>

<!-- Example User Action Flow -->
<!--
  User drags a ticket:
    BoardController handles dragStart event
    On dragEnd, BoardController gets new column id
    BoardController sends update to DataModelStore
    DataModelStore updates DataModel and triggers server update
    On success, View rerenders with new ticket position
-->

<!-- DataModelStore maintains app state and syncs with backend -->

<!-- Views (SprintBoard, CreateComposer, Child Components) are dumb, render-only -->

<!-- DataModel is the source of truth for board/ticket/column data -->
You want to use this approach to talk through a sprint board frontend using MVC.
Keep your answer clear, actionable, and easy to reference for whiteboard and live coding interviews.
Additional Considerations for Front-End Architecture
When designing the architecture for a front-end application, there are several additional considerations to keep in mind:
| Aspect | Description |
|---|---|
| Performance | Ensure that the application is responsive and performs well under various conditions. This can involve optimizing the UI rendering, minimizing the number of network requests, and reducing the size of the data being transferred. Techniques such as lazy loading, caching, and debouncing can help improve the application’s performance. |
| Scalability | Design the application to handle increasing users and data. This can involve using techniques such as pagination, infinite scrolling, and virtualized lists to manage large amounts of data. It can also include structuring the codebase to scale with the team, such as route-based code splitting, a shared component library, and micro-frontends when many teams ship to the same app. |
| Maintainability | Ensure that the application is easy to maintain and extend. This can involve using modular components, following coding standards, and writing tests. It can also include managing the codebase using tools such as linters, code formatters, and version control systems. |
| Security | Protect the application from security threats like cross-site scripting (XSS), cross-site request forgery (CSRF), and clickjacking. This can involve using techniques such as output encoding, a Content Security Policy (CSP), and secure communication over HTTPS. It can also include following best practices for authentication and authorization, such as using OAuth and JWT. |
| User Experience | Design the application to provide a positive user experience. This can involve using techniques such as responsive design, accessibility, and internationalization. It can also include following UI design best practices: consistent layouts, straightforward navigation, and intuitive interactions. |
If you are with me so far, congrats, because I know that wasn’t easy. The good news is that you can apply this architectural diagram system to any frontend system design interview forever.
Now, let’s move on to the (D) in R.A.D.I.O, the data model portion of the Frontend System Design interview.